I remember being in 7th grade and the school had a wood shop. They may have thought that by this age we would understand and respect tools. Not so in my case. A mishap with a sharp chisel and off to the hospital for a lot of stitches. I went on to the local trade school and learned more about tools and how to use them properly. What made sense at the time was how well the tools worked for the job they were created for. It made doing difficult work seem easy.
I can’t remember how many times I have used a butter knife instead of a screwdriver. The problem with tools is how expensive they can be, and it may be used only once to fix the problem and then into the toolbox, never to be used again. I can also draw from experience of buying cheap tools and trying to work on my car, only to have the tools break at the most important moment.


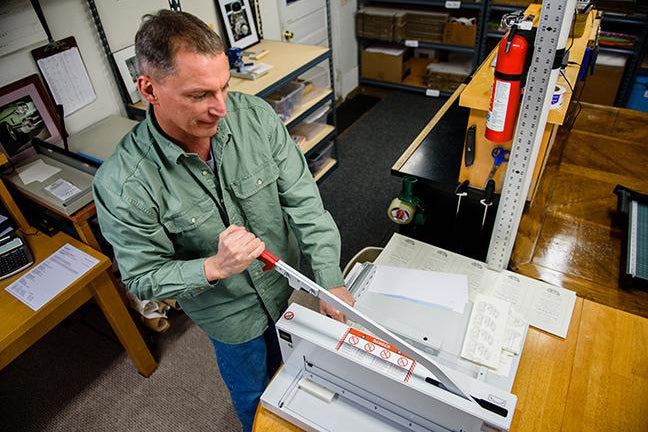
Bob's sleight of hand....
I have worked for a few different companies, and when I was provided with a high-quality tool it made the job so much easier. Sometimes companies think saving money is the most important thing, but if you have a tool that works poorly, it may take longer to do the work. If the tool is cheaply made, it may damage the product you are trying to fix or create.
When I started helping Ellen with the business (in the part time years), it was just some simple tasks to get items ready for presentation to the customer. I remember her asking me to cut ribbon for some gift tags she had created. How hard could that be? Well it was more difficult than it sounds, when I asked how many do you need, she replied “about 175, please”. Here’s the thing, they all must be the same size, they should be cut at an angle, so it looks nice, oh boy! I was instructed on how to proceed and soon realized that this project was quite a time consumer. There must be a tool, other than a sharp pair of scissors, that would help this operation along.
I ended up building a device, starting with a flat piece of plastic, like a piece of wood, ½”’ thick by 3 ½” wide by 28” long. I measured out marks at 1’’ thru 24”, leaving 2” on each end. I put a 2” finish nail at the 1” mark, and another nail at the 15” mark. I also put a nail at the 24” mark, just to hold the ribbon roll in place. I then tie the end of the ribbon to the 1” nail and wrapped the ribbon up and around the nail at the 15” mark and continue to rap the ribbon around the 2 nails. Then I used my good scissors, very sharp and clean, to cut the ribbon at the 7 1/2” mark, it was like cutting a 30” circle in half, I was left with (2) 15” pieces. I can wrap the ribbon around the nails any number of times, from 1 to 40, you just want to be conservative and not try to do too much, keep the ribbon even on the nails and it will cut easier and cleaner. An average roll of ribbon is 100 yds, converted to feet it is 300, and converted to inches it is 3600, and using my new device to cut the ribbon at 15” intervals, I average around 240 ribbon pieces per roll. The reason for the long story is that I can now cut an entire ribbon in about 10 minutes. The ribbon is just a very small part of what we do, I am so glad I could cut the time of this operation by over 70%.

When I became more involved with the business, my role was production. Ellen had been able to artistically create all her works, and then she figured out how to physically recreate. I did not need to reinvent her procedures, however I could see different ways to increase in volume the way we were manufacturing the products. Starting with 1 printer, it became crucial to have a 2nd printer for back up, just in case something should go wrong with #1. At this point in time I have 6 printers, 7 if you include my shipping label maker. I have run up to 5 at the same time. Super convenient but no need to work at a break neck pace every day. It is nice to be able to handle large production runs and get our customers the product in a very timely manner.
The next step in the process is the finish cutting. Again I stress that the tool is the most important part. It makes no sense to get this far into a project only to damage the final piece. Go for the expensive precise cutters, no apologies. I have a large table top slide cutter, and then I bought a larger model, and I may buy a new one if I feel the blade is not cutting as clean as I would like, I feel that I should be more critical of my work than the customer.
There are a few other tools we have picked up along the way. When you think about a hole punch, and I know most people do, you want to have something that makes sense. If you are only going to use it once, then sure, go to the office supply store and for $8.00 buy the handheld device. It looks like a funny pair of pliers and punch away. Well, consider Ellen asking for 175 pieces of ribbon for the 175 gift tags that need a hole punched into the top. We have just entered a whole new dimension. I found an industrial hole punch on line for around $200.00. That sounds like a lot of money, but if you take a job that is going to take an hour and turn it into a job that take ten minutes, that is where the savings will take place. The nicer the tool the easier the job and the quality is better.

I know if people are starting out, it is about the money, and I was very reluctant to spend. We did go for a while with just enough tools, in quantity and quality, to get the job done. When the money started flowing in, that is where we reinvested into our business. Having the tools to do the job quicker and keep the quality top notch has made it easier to accept new clients with the assurance that we can get the jobs done.
Thanks for taking time to read our blog.
-Bob Braley
Photo credit: Melissa Mullen Photography